Prosol

Excellence in blogging.

Showing posts with label PC System. Show all posts

Sunday, 31 May 2020

How to delete your 2nd AdSense account

1. Login to your AdSense account which you want to be closed. 

If you don’t know the 2nd account then go to the Gmail of your primary AdSense account email address. You will find an email from address saying that you have 2nd AdSense account on the email: abc…@gmail.com This a hint for you to remember your Gmail address. If you can’t remember then go to troubleshooter and login to that account.
1.Go to My account

2.Go to Payment and Subscription.

3.Go to Manage Payment Method.

4.Go to setting.


5.Select Close Payment Profile.

6. Confirm closing.

7. Give any reason for closing account.

loading...
Once your payment profile is closed, AdSense will automatically delete your AdSense account. That’s it. Hope your problem has been solved.
Thank you for being with us.

Tuesday, 12 February 2019

Install Internet Download Manager (IDM) for free

Hello Everyone. I am going to tell you, how to download and install IDM for free and it will work with out any problem. I will provide the link Downloader IDM(Internet Download Manager V6.23 Build 17).


Please follow up the following steps.

1.Download Files from the below link
   Click Here
2.Extract it.
3.Install IDM from .exe file.
4.Depending on 32 bit or 64 bit install respective patch  in the same folder where you have installed
   IDM.

That's all.
If you want to check whether your's is full version or not
You can check in the registration tab of IDM

NOTE: If you update full version which replaces Cracked file and you lose full version.So you should not update IDM there won't be more changes in updated version


Thank You Guys. Comment below if you have any problem.

Tuesday, 11 December 2018

Remove "CSE Google" Redirect

Removal of Cse.google.com redirect

Cse.google.com is a legitimate search engine, however there are plenty of browser hijackers which will redirect the users search queries to Google Search. This is most likely done to generate advertising revenue by using Cse.google.com for its search results.

Let’s be clear about something, Cse.google.com is not a browser hijacker and is not malicious in any way. However, occasionally, malware will explicitly mess with your web browser settings and Cse.google.com will be displayed. Cyber criminals use Cse.google.com to generate revenue from each search you perform.

When the Cse.google.com browser hijacker is installed on a PC, common symptoms include:


  • Changing the web browser’s default homepage to Cse.google.com
  • Changing the browser’s search provider, built-in search box to Cse.google.com
  • Ability to modify the ‘new tab’ functionality to launch the modified search portal page
  • Loads into the web browser via an extension or add-on
  • Web Browser shortcuts are hijacked to redirect to Cse.google.com
The below instructions are for Windows users;

To remove the Unwanted Cse.google.com redirect, follow these steps:

STEP 1: Uninstall the malicious programs from Windows
STEP 2: Use Malwarebytes to remove the Cse.google.com redirect

Step 1: Uninstall the malicious programs from Windows

Known malicious programs: Search Module, Search Module Plus or Google.Vc, OtherSearches, YeaDesktop, Wajam, 1.0.0.1, DNS Unlocker, Cinema Plus, Price Minus, SalesPlus, New Player, MediaVideosPlayers, Browsers_Apps_Pro, PriceLEess, Pic Enhance, Sm23mS, Salus, Network System Driver, SS8, Save Daily Deals, Word Proser, Desktop Temperature Monitor, CloudScout Parental Control, Savefier, Savepass, HostSecurePlugin, CheckMeUp or HD-V2.2.

The malicious program may have a different name on your computer. If you cannot find any malicious programs on your PC, you can proceed with the next step.

Step 2: Use Malwarebytes to remove the Cse.google.com redirect


1: You can download Malwarebytes by clicking the below AdwCleaner
     AdwCleaner
I have provided the link of AdwCleaner but you have to install its latest version.

2:  Double-click on the Malwarebytes setup file
When Malwarebytes has finished downloading, double-click on the mb3-setup-consumer-x.x.x.xxxx.exe file to install Malwarebytes on your PC. In most cases, downloaded files are saved to the Downloads folder.

3: Follow the on-screen prompts to install Malwarebytes
When the Malwarebytes installation begins, you will see the Malwarebytes Setup Wizard which will guide you through the installation process. To install Malwarebytes on your PC, click on the “Agree and Install” button.

4: Click on “Scan Now”
Once installed, Malwarebytes will automatically start and update the antivirus database. To perform a system scan, click on the “Scan Now” button.

5: Wait for the Malwarebytes scan to complete
Malwarebytes will now start scanning your computer for adware and other malicious programs. This process can take a few minutes, so we suggest you do something else and periodically check on the status of the scan to see when it is finished.

6: Click on “Quarantine Selected”
When the scan has completed, you will be presented with a screen showing the malware infections that Malwarebytes has detected. To remove the malicious programs that Malwarebytes has found, click on the “Quarantine Selected” button or Clean button.

7: Reboot your computer
Malwarebytes will now remove all the malicious files and registry keys that it has found. To complete the malware removal process, Malwarebytes may ask you to restart your computer. When the malware removal process is complete, you can close Malwarebytes and continue with the rest of the instructions.

Monday, 21 May 2018

How to remove a specific label from many posts at a time

Hi friends, hope you are doing well. Most of the time when someone want to remove a specific label from many post, it seems quite difficult and time wasting to remove a specific label from each post one by one. Here, I am going to share a sample way to remove any label from many post at a time. It is quite easy and simpler for anyone. Now, just follow up the following few steps and make it done within a minute.
Steps:
1. Login to your blog account.
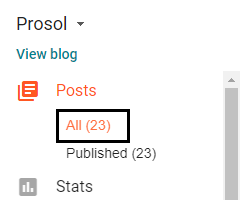
2. Go to post and click on “all”.


3. Go to drop down list located at the left side of the search bar in the right sided upper region.


4. Select the label which you want to remove.
5. Select those posts from which you want to remove a desired label.
6. Go to the drop down list located at left side of “Publish” option.


7. Click on the specific label for remove or addition purpose.

That’s all !!!
Thanks.

Sunday, 20 May 2018

How to change the language of your search engine

Friends, Sometimes you might have noticed that when you search something with search engine of your browser. You will find a completely different language your browser search engine. It seems very annoying to most of our friends. But it happens sometimes because of your locations automatically.


 It is very simple to change the language of your search engine. Just follow up the following Steps.
Steps:
1. Open you browser.
2. Go to Option.
3.  Go to "three dotted column" located at the right side of top most region and select setting.
Type "Language" in the search bar. Then open "Languages and spell-checker settings.
You can add the language of your own choice.

That’s All.
For further quarries, comment in the box below.

Tuesday, 10 October 2017

How to Share internet from your PC?

It is common to everyone that whenever someone uses broadband net or something else for internet on PC. Then most of the time he/ she needs to connect his/her other devices with internet. For this purpose you have to share your internet with other devices. Now, there are two possible option to share your network. Probably with first one, you have to use a third party software just like Connectify-me, Virtual router, Connectify Hotspot and etc. In the second one, you have to give few commands in the command prompt.


So, today I am going to share it with my friends. Just follow up the following steps and share your network with other devices in just few minutes.
Steps:
1.   First make sure that WiFi is set to on. Open Command prompt (Admin) using Win X keys.
2.   Type the following command and hit enter.
       netsh wlan set hostednetwork mode=allow ssid=Myntwork key=yourpassword
       Here “Mynetwork” is the name I have chosen and “yourpassword” is the password I have chosen.
3.   Type the following and hit enter to start your wireless hosted network.
       netsh wlan start hostednetwork


Create WiFi hotspot in Windows 10/8/7


4.  Go to:  Control Panel\All Control Panel Items\Network and Sharing Center.
     Windows 7 offers the Manage wireless networks link on the left side above Change adapter settings.
     Windows 8 and Windows 10 do not.
5.  By clicking on Change adapter settings, you will find all your Network Connections.
6.  Now, right-click on the connection you are currently using to connect to the Internet and select
      Properties.
7.   Click on the Sharing tab in the Ethernet Properties box and select “Allow other network users to 
      connect through this computer’s Internet connection”. 
8.  Under Home networking connection, from the drop down menu, I selected Local Area Connections
     and clicked on OK.

Create Mobile Hotspot in Windows 10


9.  Open Settings > Network & Internet > Mobile hotspot.
      Here toggle the Share my Internet connection with other devices to the On position. You can also
     edit network name and its password.
You can stop sharing your network by typing following command in command prompt.
netsh wlan stop hostednetwork

That’s all !!!
For further quarries, comment in the box below.


Thursday, 21 September 2017

How to block specific sites in Chrome?

Blocking sites on your browser is important in case when your system is used by many others i.e. Kids etc. But sometimes, when you got a problem with your PC. I mean when some sites open automatically by your browser. Then it is annoying to everyone. It is simple to get rid of it by following up the given steps.
Steps:
1. Open your browser.

2. Click  BlockSite .

3. Add it to your Chrome.

4. Then, go to the 3 dotted column located at the top right most position and select “More Tools”.

5. Select Extensions and enable BlockSite extension.


6. Go to its option.

9.   In “Blocked Sites”, you can add the URL of the site you want to block by clicking ADD Page.

10. Once you add it. Then you can refer it to other site by clicking a row of 3 dots in front of the site
      and adding the URL  for referring.

11. In Protection option, you can set a password of your choice on it.


That’s all!!!
Hope it works for you.
Thanks.


Wednesday, 20 September 2017

How to open Chrome in different screen modes by default?

There are different modes of chrome. Everyone have a different selection mode when it comes to opening of chrome during startup. I.e. half screen mode, Full screen mode, maximized full mode etc. 
Opening chrome with full screen mode or the other one you want is pretty simple. You just need to make some changes in the path of the Chrome shortcut located on your PC screen.

To make it enable, just follow up the following simple steps.
Steps:
1. Go to the properties of the Chrome Shortcut by right clicking on the shortcut of Chrome.
2. Go to “Target” option and edit the path of Chrome Shortcut.
3. Mode:
      Full Screen Mode:
       Past “ --start-fullscreen” after .exe”.
       i.e.  "C:\Program Files (x86)\Google\Chrome\Application\chrome.exe" --start-fullscreen
       OR
       Maximized Mode:
        Past “ -start-maximized” after .exe”
        i.e.  "C:\Program Files (x86)\Google\Chrome\Application\chrome.exe" -start-maximized

        Note: Giving space after .exe” is necessary for both modes.
4. Select “Apply” then select “Continue”.
5. Save it by Clicking OK button.
You can disable full screen mode by Pressing F11.
That’s all.
For further quarries, Comment in the box below.
Thanks.


Monday, 18 September 2017

How to change your search engine in browser

Friends, Sometimes you might have noticed that when you search something with search engine of your browser. You will find a completely different search result as compared to google search engine. It seems very annoying to most of our friends. But it happens sometimes. Today, I am going to share a simple solution for this problem.


 It is very simple to change the search engine of your browser. Just follow up the following Steps.

Chrome:

Steps:

1. Open you browser.
2. Go to Option.
3.  Go to “Mange search engine”.
 You will find two Sections: Default search options and other search engines.
In the Default search options:
Delete the current Google search option but you will have to select a different Default search before Google can be deleted.
In the other search engine section: Add a new search engine i.e. Google (or the one you want)

Keyword: google.com
URL: https://www.google.XXX/search?hl=en&q=%s&meta=
Change the XXX to the search site you want so add .com or .co.uk or .es etc.
After finishing it, Make it Default.
That’s All.
For further quarries, comment in the box below.

How to prevent auto downloading of a specific link with IDM from UC browser?

Friend, hope you are doing well. Sometimes you have noticed when your IDM starts auto downloading from a specific link every time you start your UC browser. It seems annoying to everyone and want to get rid of it. Today, I am about to share a simple solution for it. Just follow up the following simple steps and within few minutes you will get rid of it.
Steps:

1. Normally when you start your UC browser, a downloading option from IDM will appear on your
    screen. Just copy its downloading link from downloading bar of IDM.
2. Open IDM.
3. Go to “Option”.
4. Go to “file types”.
5. Select “Edit list” option.
6. Select “Add” option.


7. Paste the link and press OK three times.

That’s all!!!
Hope it works for you.
Thanks.

Tuesday, 12 September 2017

How to rotate the display of a video file in KM Player and VLC Player?

Hey friends, it is common that sometime you may have a video file with default rotated display or shoot a video with some angle and then you face a problem specially when watching it on your PC. It is very simple to rotate the display of your video file when watching it. Today, I am going to share a simple solution for this problem and after following its steps, you will be able to watch it perfectly without any rotation problem on VLC and KM Player. Just follow up the following steps.

Steps for KM Player:

1. Play a video file with KM Player.
2. Randomly right click on the screen.
3. Go to Video (Basic).
4. Go to Screen Rotation (CCW).
5. Select an option of your choice (i.e. 90 Degrees Rotation) accordingly to your video file.


Steps for VLC Player:

1. Play a video file with VLC Player.
2. Go to Tools located at the upper menu bar and select “Effects and Filters” or Press Ctrl+E.
3. Go to “Video Effects” and then choose “Geometry”.
4.  Mark tick in box located in front of “Rotate” option.
5.  Click on the ball and hold it till you rotate it accordingly to your requirements.
6. Close it.


That’s all !!!

For further quarries, please comment in the box below.
Thanks.

loading...